Recently a fellow D365 developer, Lars Müller, wrote an article on how to Build a versioned XrmToolBox plugin.
I am taking this one step further, to show you how to create a complete CI/CD pipeline for your XrmToolBox tools.
Of course, the primary reason for creating an automated pipeline for Continuous Integration / Continuous Deployment is to standardize versioning, naming, and any other metadata about your tools. In addition to that, automated tests are performed during the build which will highlight any possible new bugs or vulnerabilities in your code.
This may seem like quite a long article, but all the steps are really simple and a lot of them are probably already in place for you, and there are a lot of nice pictures too.
1. Set up VSTS Azure DevOps
Everyone should have their own VSTS Azure DevOps tenant. It just makes life so much easier. (Ok, editing stops here, it’s still VSTS in this article.)
It’s free!
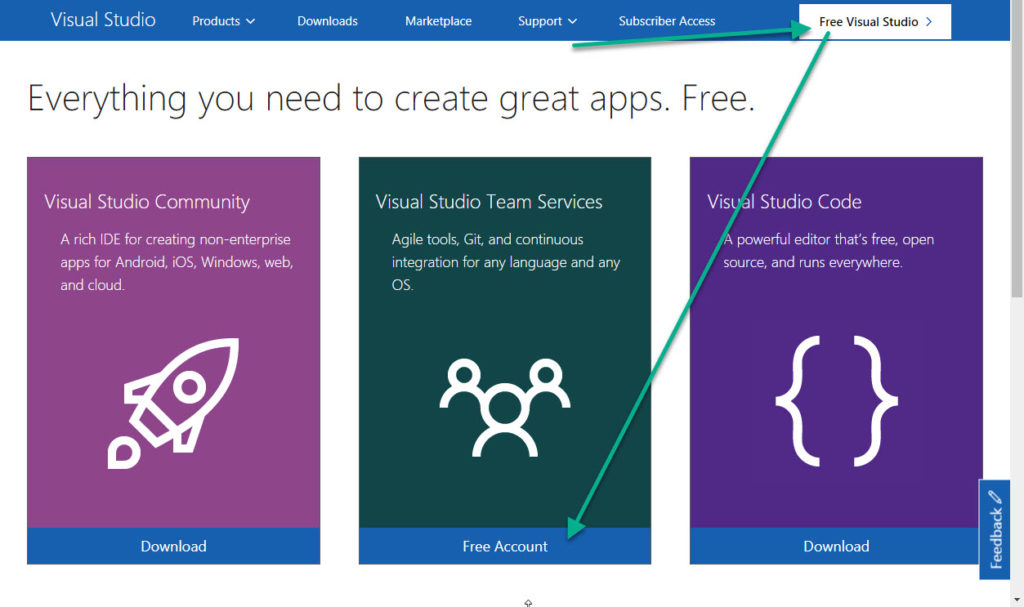
Go to visualstudio.com and register your own playground, if you don’t have one already.
Enter an existing Microsoft account to log in, or create a new.
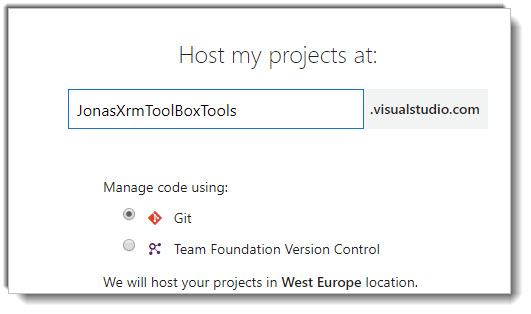
Then you need to come up with a unique tenant name.
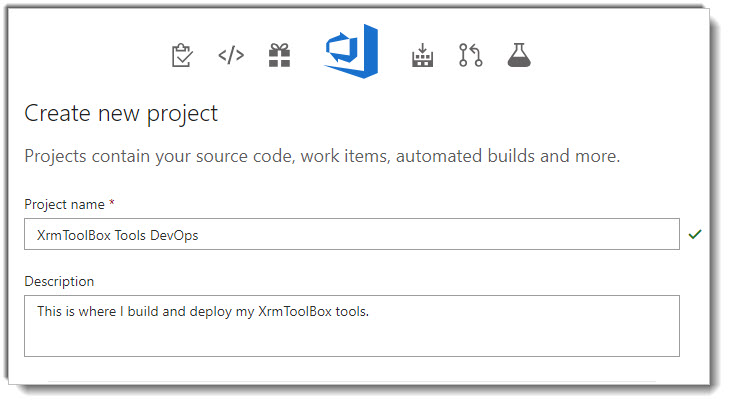
Create project
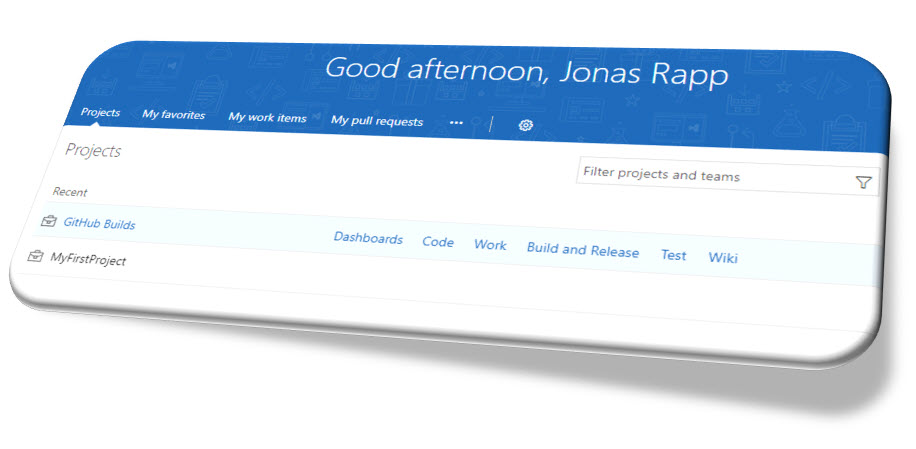
Then you can create a new project to host your builds and releases, or use an existing.
2. Prepare Build definition
In your VSTS tenant, go to Build and Release, and create a new Build definition.
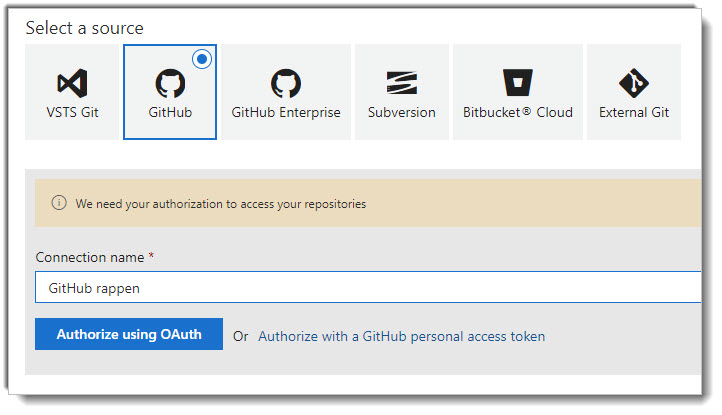
Connect to source
First you need to select source for the build, which probably is GitHub (since all our awesome XrmToolBox tools are open source, right? 😉 )
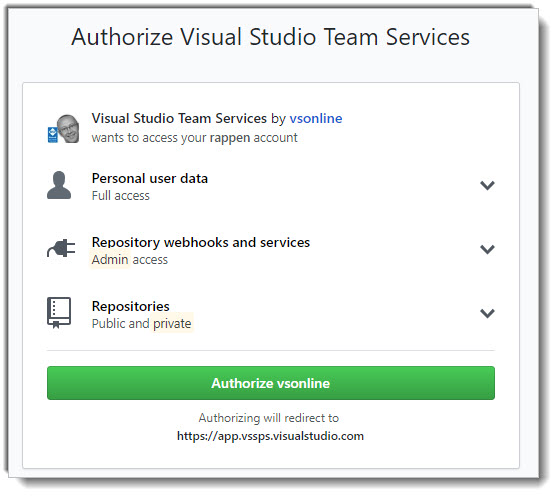
Enter credentials for your GitHub account to authorize VSTS to access the code to build.
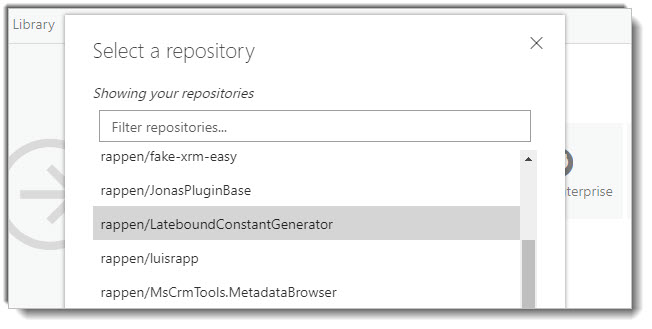
Select the repository to use for the build process.
Build template
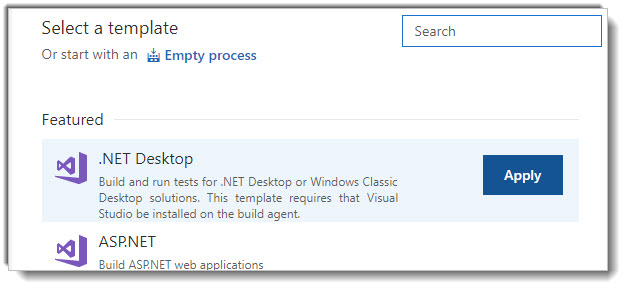
Now select a template to start with. I usually select a standard .NET Desktop template, as it contains most of the steps I need.
3. Customize Build definition
Now it’s time to start customizing the build definition for our needs.
NuGet Pack
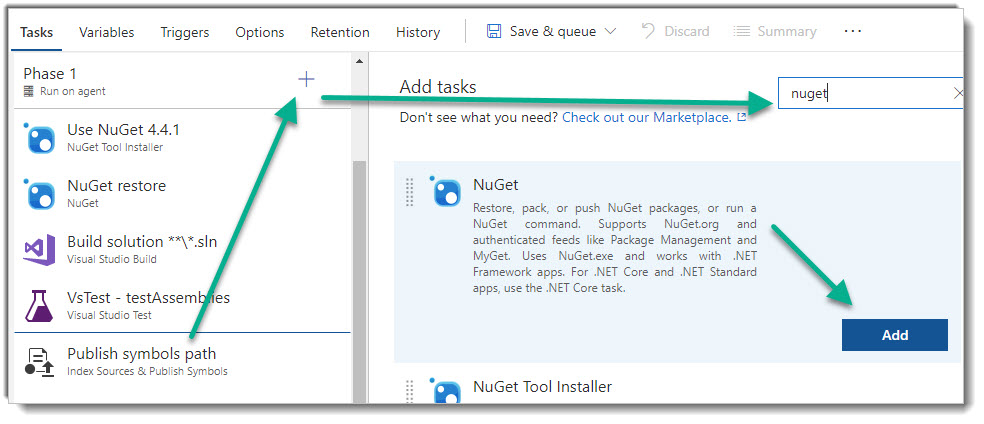
As XrmToolBox plugins are published as NuGet packages, let’s add a NuGet Pack task after build and tests have been completed.
Customize the task to create a package using the nuspec file in the project and setting version from the build. Verify the highlighted fields below.
Artifact
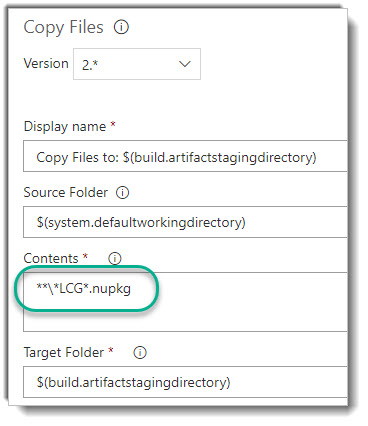
As the only artifact we are interested in is the NuGet package, update task Copy Files to: $(build.artifactstagingdirectory) with the highlighted settings. In this case I am not specifying the exact file name, I don’t really know the sub folder structure that is the result of the build and pack, so I make it easy for myself. I just know it will be the only file containing LCG and ending with .nupkg.
Version
For my own tools, I follow the versioning topology that Tanguy himself uses:
Pattern: 1.yyyy.mm.nn
Example: 1.2018.5.3
The example above would mean the third build in May 2018.
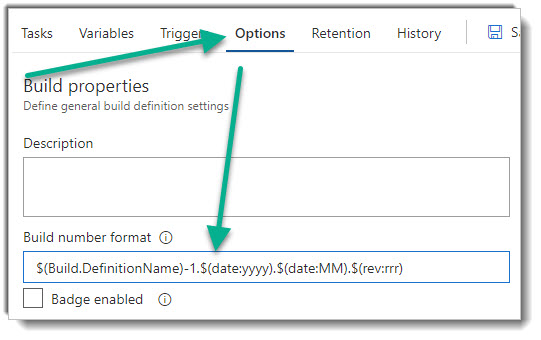
To tell the build definition to use this topology, go to tab Options and edit the Build number format.
Build number format used:
$(Build.DefinitionName)-1.$(date:yyyy).$(date:MM).$(rev:rrr)4. Prepare your tool
Experience has taught me a few things to remember when creating tools for XrmToolBox. These will make the delivery process smoother, and your tool more stable and less prone to interfere with other tools.
ILMerge
Yes, in the world of Dynamics 365 we often have to merge assemblies. We don’t like it, some refuse, some find other solutions.
But for your XrmToolBox tools that rely on assemblies not part of .net framework, CRM SDK or the XrmToolBox package, please ILMerge them into your assembly.
More than once, my tool has stopped working after some other tool with another version of the same dependency was installed, and vice versa.
NuSpec file
For proper exposure of your tool, make sure you get the details of the NuSpec file correct.
<package >
    <metadata>
        <id>Rappen.XrmToolBox.TheCoolestTool</id>
        <version>1.0.0</version>
        <title>The Coolest Tool for XrmToolBox</title>
        <authors>Jonas Rapp, Sweden</authors>
        <owners>rappen</owners>
        <projectUrl>https://github.com/rappen/TheCoolestTool</projectUrl>
        <iconUrl>https://raw.githubusercontent.com/rappen/TheCoolestTool/master/images/LCG-150-transp.png</iconUrl>
        <requireLicenseAcceptance>false</requireLicenseAcceptance>
        <description>An XrmToolBox plugin to do extremely cool things in Microsoft Dynamics 365/CRM.</description>
        <summary>An XrmToolBox plugin to do extremely cool things in Microsoft Dynamics 365/CRM.</summary>
        <releaseNotes>
* Improved Awesomeness
* Azure integration deluxe
        </releaseNotes>
        <copyright>Copyright 2017-2018 Jonas Rapp</copyright>
        <tags>XrmToolBox Plugins TheCoolestTool</tags>
        <dependencies>
            <dependency id="XrmToolBox" version="1.2017.10.19" />
        </dependencies>
    </metadata>
    <files>
        <file src="bin\Release\Rappen.XTB.TCT.dll" target="lib\net452\Plugins" />
    </files>
</package>
Note that the version specified on line 4 can be anything, as version will be set during the build.
Make sure the releaseNotes and description are relevant, as they are presented in the Plugins Store of XrmToolBox and cannot be changed on NuGet once the version is uploaded.
5. Build it!
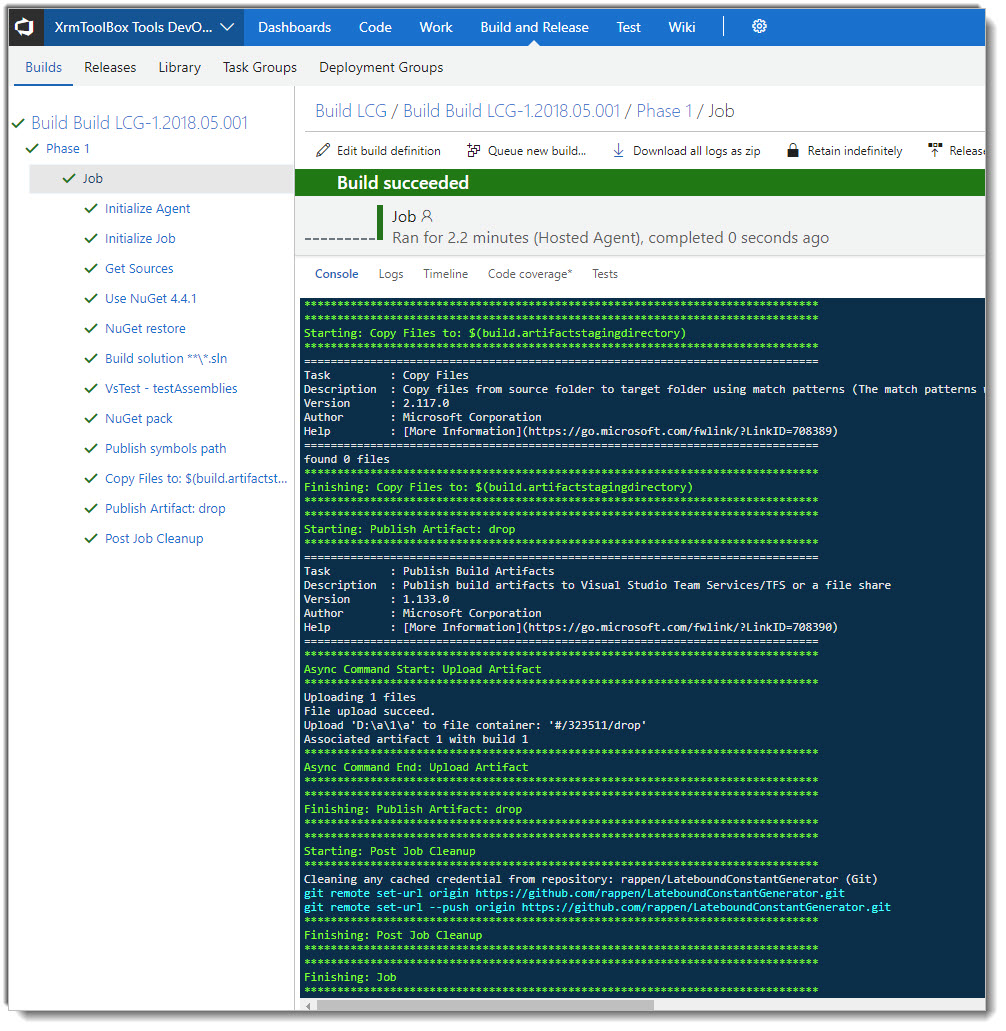
When all code is committed, fire up a new build!
You do this by selecting Queue new on the build definition.
Verify build
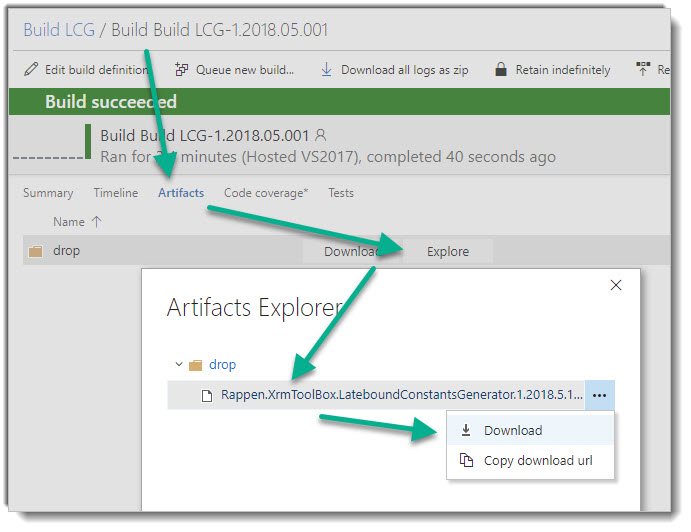
You can now investigate the artifact created, to verify the build.
Go to the build just created, Artifacts, Explore, and then Download the nupkg file.
Open the folder with the downloaded file, rename it to .zip, and open the zip file. You will there see a structure like this.
To actually test the built tool, copy the dll file to your Plugins folder of XrmToolBox and start it up.
6. Release the tool
In this tutorial I have separated the Build process from the Release process, as I like to be able to verify the build before going public.
Create Release definition
To create a Release definition to publish the created NuGet package, start with an empty process.
Add a NuGet task to the Environment that was created.
Verify the highlighted fields below.
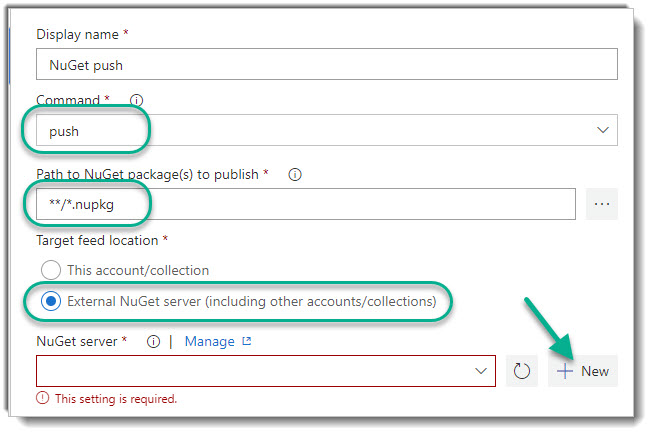 Connect to NuGet
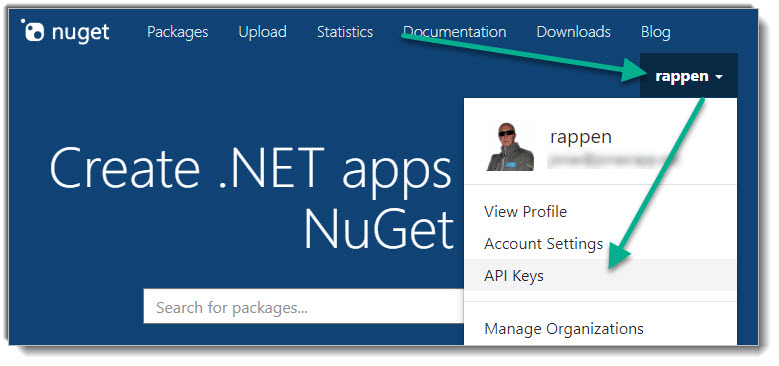
To authenticate VSTS to your NuGet account, click the New button. Open a new tab in your browser, go to https://nuget.org and log in with your account. Go to the API Keys section under your profile.
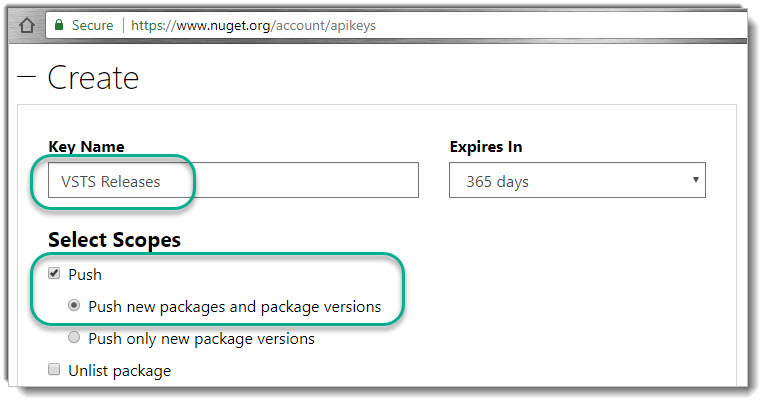
Create a new API Key.
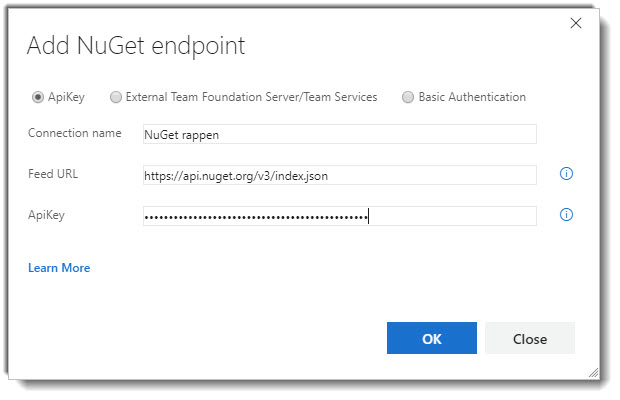
The key that is generated will not be possible to find again, so make sure you copy it and store it in a safe place. Also, paste it into the API Key field in the new NuGet endpoint form. Add a name for the endpoint, and the url to the NuGet API.
Click OK, and be sure to select this endpoint in the NuGet Push task.
Create Release
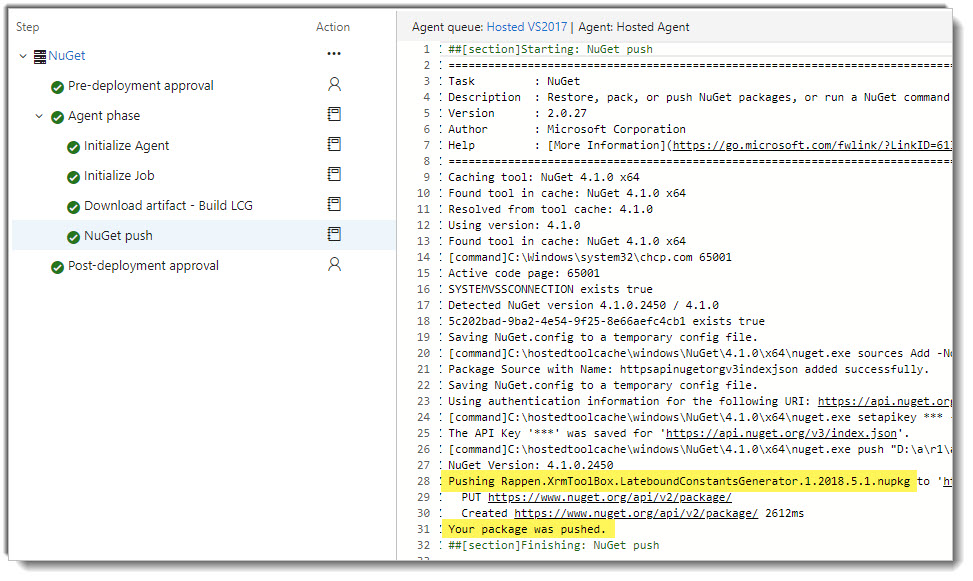
Save the release definition and click the button to create a new Release.
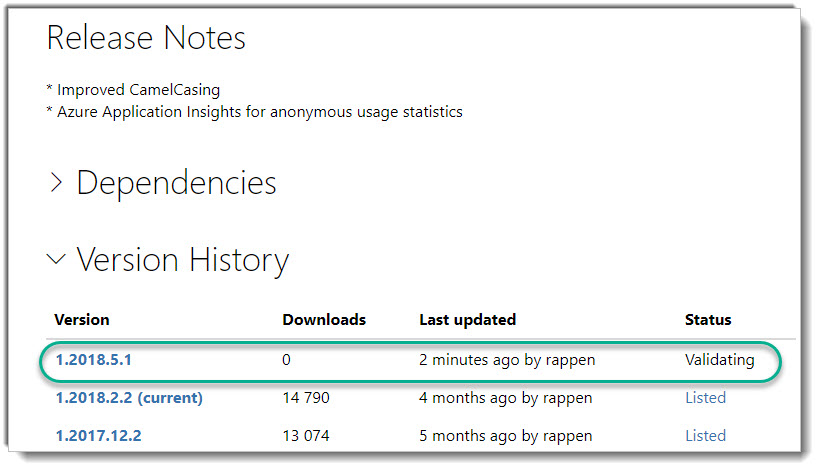
Checking NuGet show the new version has been uploaded and is awaiting validation.






Hi Jonas,
thank you for sharing this great guide. It took me a moment and infact I struggeled with the ILMerge part. It works fine on my local VisualStudio, but seems to have troubles on VSTS. So I switched to ILRepack, which works fine.
One question is still open for me. How do you update the Assembly and File Version Number with the value, as you use in the NuPack Task?
Thank you,
Lars
This package contains the “Apply version to assemblies” task:
https://marketplace.visualstudio.com/items?itemName=InnofactorSE.cinteros-devutils-ci-build-tasks