
The community of developers for Microsoft Dynamics 365 / CRM in general and for XrmToolBox in particular is a great bunch of people. But I wish there were more of us – the more the merrier ?
The D365 Saturday phenomenon with pro bono speakers at a full day event, free of charge for participants, has spread like wildfire over the last couple of years.
The connection to the XrmToolBox is obvious:
- Both were started by CRM heroes (Raz for the Saturdays and Tanguy for the toolbox).
- Both are driven by a passion to share and a love for the platform.
- Both do these things without any ambition to “get rich quick” (or ever).
I got an idea to combine these two phenomena.
So I have recently started to go to D365 Saturday events to dive from the high cliff, remove the safety net, shoot from the hip – and meet the audience with one question:
What shall we build today?

The favorite request so far is the idea to create a tool to convert Dialogs to Canvas Apps, but as we only have about 45 minutes – not 45 days and 45 nights that is slightly out of our league.
The first time I did the session (in Stockholm) we decided to create a “Custom Duplicate Finder” where you could specify how to match attributes on an entity to find possible duplicate records.
The second time (in Glasgow) the idea that got the most votes was a tool called “Workflow Trigger Analyzer” where you could find which processes that triggered off changes to a specific attribute.
The examples above are really good ideas that I think deserve a place in XrmToolBox. We do however not go through the full process of finishing the logic and polishing the tool to be ready for publishing, so I will leave these ideas for others to finalize. Both ideas can be evolved to easily expand the features available, and I would really encourage anyone interested to pursue them!
What we do get in just 30-45 minutes of coding is a good basic code structure, insights to the tool description and inherited XrmToolBox control classes, sample methods, async calls, some useful interfaces and a few more tips and tricks.
We might not get to the actual “intelligence” the tool was supposed to provide… But in the words of my old electrophysics teacher:
The rest is just mathematics!
Below is a description of what we usually do during the session.
Getting started
First, make sure you have downloaded the project template for Visual Studio.
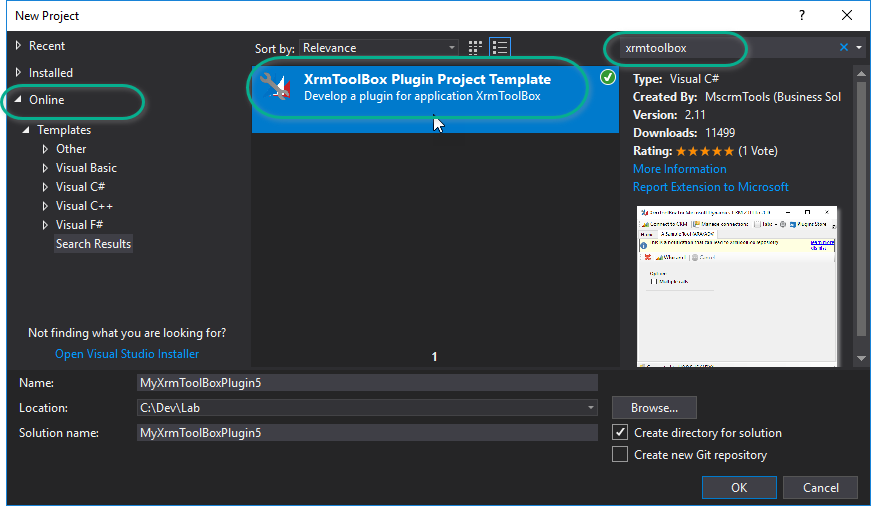
Create a new project based on this template.
(Visual Studio will warn you about opening some files – I assure you, you can trust the template )
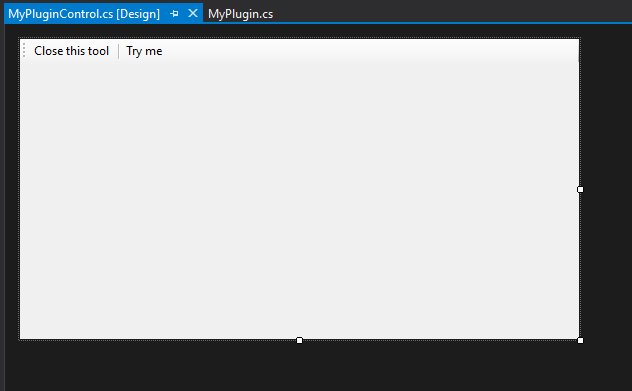
You now have an almost blank canvas to fill with awesomeness!
I like to do “iterative development” – i.e. code a bit, run and test, code a bit more… So the first thing we want to do is set up the project for debugging. This is quite easily done by following the documentation on the XrmToolBox website: https://www.xrmtoolbox.com/documentation/for-developers/debug/
Custom XrmToolBox controls
A few custom controls for this old style WinForm development for Dynamics 365 have been published for anyone to use. A couple that I usually use are part of a NuGet package by James Novak called xrmtb.XrmToolBox.Controls. It contains a number of useful controls, for example a DropDown control and a ListView control reading CRM metadata to display Entity information.
These controls are easily added to the form (the XrmToolBox tool user control) and they can then automatically load metadata for entities, attributes and optionsets as you set the Service property. Other controls can list solutions in the connected environment, and more controls are sure to be added to the package.
Another NuGet package is Cinteros.Xrm.CRMWinForm created by – well – me. This package contains some helper methods for metadata calls, but primarily a DataGridView control that is customized to accept an EntityCollection as the DataSource property. It has a few added properties to control the layout, and some events including record and attribute specific information to easily access the underlying Dynamics data.
This control will be consolidated with the ones above by James Novak, to provide a one stop place to get handy gadgets for simplified WinForm development for Microsoft Dynamics 365.
Connecting the controls
Once the form layout is in place, it is time to “connect” the controls to CRM.
First I make sure the entities dropdown use the current connection by adding the following line to the overridden UpdateConnection method to set the Service property of the control to the new service provided by the hosting XrmToolBox.
entitiesDropdownControl1.Service = newService;
The CrmGridView does not require the service, as it is populated by setting a value to the DataSource property, but adding the service makes the control aware of the metadata in CRM, and this enables it to display column names etc with display names in the language of the current user, instead of only logical names. This property is set in the same way:
crmGridView1.OrganizationService = newService;
To have the CRMGridView control show display names of columns and values, set the ShowFriendlyNames property to true.
Layout tricks
From a handful of years experience of creating tools, and being a user of both my own and others’ tools, I have a few tips for tool developers.
Panel
Panels makes it so much easier to group controls together and move them around as you are working out the best layout.
SplitContainer
Split containers basically consists of one panel with two panels on it, separated by a splitter. This makes it really easy to layout your form so the user can resize parts of the form to fit the individual needs and the flow when the whole window is resized.
GroupBox
Using group boxes can improve perception of a form by adding frames and headers around groups of containers.
Dock
Once you have a layout based on the different types of containers mentioned above, use the Dock property of these containers to ensure full usage of the form and a continuous flow of the panels and controls.
Anchor
For individual controls that are not docked should have proper anchors. The most obvious anchor specification it “Top,Left,Right” to ensure that a control keeps the designed distance from the top of the parent container, and both to the left and right. This will resize the control in width with the parent control. Similarly a button in the bottom right corner should have anchors “Bottom,Right” to stay put down in the corner. Then pray that Patrick Swayze does not hear what you did.
TabOrder
My final tip for the layout of your tool is to set the tab order of all containers and controls. Tab order defines the order the controls are focused when you use the TAB key rather than clicking around with the mouse. Note that tab order is respected within the container they are placed on, they are not global.
Publishing
Since our tool didn’t get all the way to 1.0, we didn’t publish it during the session.
But I encourage you to read the documentation on https://www.xrmtoolbox.com/documentation/for-developers/deploy-your-plugin-in-plugins-store/
I have also written an article on how to use Azure DevOps to automate the build, release and deploy pipeline: http://jonasr.app/2018/05/xtbvsts/
Sample Code
Sample code from these sessions that utilizes existing views of the selected entity to display the data, is available on GitHub.
https://github.com/rappen/XrmToolBox-Samples
Feel free to dig into the code, see how I solve things, run it and try it and change it and play around. It’s fun!
Join me!
Check out my Speaker Schedule to see where you can find me next!
2 thoughts on “We create XrmToolBox tools at Dynamics 365 Saturdays!”